Showing posts with label Stampin' Up!. Show all posts

Sunday, July 9, 2023

Give Creativity a Whirl

If you'd like to share a creative card with your friends and family, try using the Give It a Whirl dies with your stamp sets. Find images and sentiments that fit the window you wish to use and get those ideas flowing. I got several ideas from Pinterest and YouTube from many inventive creators.

The first card is using the Playing in the Rain stamp set and dies along with the Give It a Whirl dies. I did use a retired Designer Series Paper (DSP--Rain or Shine) as well as Basic White and Balmy Blue cardstocks. I used a card designed shared by Wanda Pettijohn as my muse. 
4 1/4" X 11" Balmy Blue cardstock; score in landscape at 5 1/2"
5 3/8" X 4 1/8" Basic White cardstock (front)
5 3/8" X 4 1/8" Designer Series Paper (DSP--I used retired Rain or Shine); die cut with front panel & window (whirl dies)
5 1/4" X 4" Basic White cardstock (inside)
4" X 4" Thick Basic White cardstock; die cut wheel (whirl dies)
1" DSP circle
3/4" X 5 1/4" DSP strip (inside)
Scrap Basic White cardstock; die cut clouds (whirl dies) & turtle (rain dies)
Scrap Old Olive cardstock; die cut grass (wheel)
1/4" X 4" Cajun Craze cardstock (front)
Watch the video for tips, hints, and instructions. 

The second card (2 different designs)is using the Silly Goose stamp set.  I used retired cardstocks (Mango Melody and Coastal Cabana) with Calypso Coral, Balmy Blue, Petal Pink and Basic White cardstocks. The DSP is retired as well. I was inspired by Sharni Haines (AU).
5 1/2" X 8 1/2" Calypso Coral/Coastal Cabana (retired) cardstock; score in landscape at 4 1/4"
4" X 4" Thick Basic White cardstock; die cut wheel (whirl dies)
5 3/8" X 4 1/8" Designer Series Paper (DSP- retired); die cut front panel (whirl dies)
5 1/4" X 4" Basic White cardstock (inside)
3/4" X 3" Petal Pink/Balmy Blue cardstock 
1/2" X 2 1/2" Mango Melody (retired)/Coastal Cabana (retired)
3/4" X 2 1/2" Basic White--stamp sentiment--die cut banner (whirl dies)
1" circle DSP
Scrap Basic White; die cut scallop circle (whirl dies)
Small bow linen thread/twine, optional
Brad
The video demonstrates how to instructions, hints, and tips.

Thank you for visiting my blog. If you like these projects, please like & share the videos. Subscribe to my YouTube channel & click the bell icon to be notified when I upload a new video. If you'd like to purchase any of the products used, click the Shop with Me link on this page.

Sunday, June 11, 2023

Fun Fold Funny Cards

I've been very interested in making this fun fold technique card that is a slider pop out, and I finally found some directions from Jill Blanchett that I decided to use. The Little Monkey and Taco Fiesta stamps really lend a creative flair to the fun fold cards.


These cards can be made with any stamp set, for any occasion, and using different colors of cardstock or Designer Series Paper (DSP). Just use these measurements and follow the directions to create this technique. 

Primary cardstock:
4 1/4" X 11"
5 1/2" X 3" 
3 1/2" X 2 1/4" (if desire additional front rectangular layer)

Basic White/Very Vanilla (coordinate with DSP):
5" X 2 1/2" (X 2)
3 1/4" X 2" (for additional front rectangular layer)
Scraps for stamping images to punch or cut out, I used 3" X 2 1/2" and 3" X 3"

DSP:
4" X 1 1/2" (X 2)
4" X 3/4"

Scrap Daffodil Delight for banana

I used Garden Green cardstock, Regals DSP paper stack, Basic White cardstock, Daffodil Delight cardstock, Little Monkey stamp set, Taco Time stamp set, Tear and Tape adhesive, Seal + adhesive, and various inks, Stampin' Write markers, Stampin' Blends--including the Natural Colors Blends, and an assortment of Clear Blocks.

Below are a couple of diagrams as visual aids for scoring, cutting, and placement for DSP. View the video for instructions. 


If you like the project, please like and share the video on YouTube, which helps my channel grow. If you enjoy my channel, please subscribe to see more content, and click the bell icon to be notified when I upload a new video.  Thank you for sharing your time with me. For ordering products used in these cards, please click the Shop with Me button on this site.

Other cards made with these stamps sets following examples found on Pinterest by various Independent Demonstrators (there are no dimensions for these cards):


Sunday, March 19, 2023

Spring and Summer Teasers

Easter will be here soon, and the Host of my March in person stamp class wanted to make a card using the Easter Bunny stamp set. I saw a sliding card made by Kelly Atcheson, and used that idea to make a card where the bunny moves across the card when the inner piece is pulled out. This is a slimline card and will need a longer envelope. 
You will need:
8" X 8 3/4" Old Olive cardstock; score with 8" at top (portrait)
3 1/2" X 8 1/2" Designer Series Paper (DSP) this is from Rain or Shine Specialty 
3 1/2" X 8 1/2" Basic White cardstock (inside)
3/4" X 2 1/2" Basic White cardstock (mechanism)
Scrap Basic White cardstock (stamp 2 bunnies and color)
Watch the video for instructions and tips.

The other card is a taste of summer using retired stamp sets called Lemon Zest and Jar of Love. There is a stamp set in the January-April 2023 mini catalog called Sweet Citrus. The Brewed for You stamp set might be able to be used (mug or glass) instead of the jar. This idea came from cards I saw on Pinterest made by Karen Robinson, Linda Suarez, Heejung Hunsberger, and Laurel Seabrook. I used 2nd generation stamping for the lemons.
Card supplies:
5 1/2" X 8 1/2" Daffodil Delight cardstock; score in landscape at 4 1/4"
5 3/8" X 4 1/8" Old Olive cardstock 
5 1/4" X 4" Basic White cardstock (X 2)
1/4" X 7" (straw)
Scrap Basic White (whole lemon, lemon slice, leaves, jar)
Scrap Vellum cardstock (die cut outer jar)
The instructions and some helpful tips are in the video.

Thank you for reading my blog and letting me share my love of paper crafting. Hopefully, you were able to find projects that you'd like to make. Please share my posts, like my YouTube videos, subscribe to and share my YouTube channel, and click on the bell icon to be notified when I upload other videos. You can purchase products and tools through the Shop with Me link.

Tuesday, February 21, 2023

I Scream, You scream, We all scream for Ice Cream!

One of the first things I wanted in the January-April 2023 mini catalog was the Share a Milkshake bundle. It is great for Valentine's Day, birthdays, and other celebrations. There were so many creative projects made by other Stampin' Up! Demonstrators where I was able get ideas for my in-person class.

One of the cards we made in class came from an idea shared by Lynn Dunn. This uses the Share a Milkshake dies and stamp set to create a 3-D effect on the front of a card. I also used the Scalloped Contours scalloped edge. The designer series paper (DSP) that used is retired, but I couldn't get the Dandy Designs from the January-February 2023 Sale-a-bration brochure in time for the kits I made.


The dimensions of pieces that I used are:
  • 5 1/2" X 8 1/2" Thick Basic White cardstock; scored in landscape at 4 1/2"
  • 5 1/2" X 1 1/4" Mango Melody cardstock, die cut one long side with the Scalloped Edge
  • 5 1/2" X 2" Designer Series Paper (DSP)
  • 4" X 2" DSP
  • 3/4" X 2 3/4" DSP
  • 2 1/2" X 2 1/4" Basic White cardstock, emboss with the Gingham embossing folder
  • 1/2" X 2 1/4" Basic White cardstock strip for the sentiment label
  • Waffle Cone die cut from Crumb Cake cardstock
  • Basic White cardstock scrap to stamp and die cut an ice cream scoop and cherry
  • Pool Party cardstock scrap to stamp and die cut another ice cream scoop 
  • Twine
  • Adhesive-backed sequins to coordinate with DSP
  • Silver Foil scrap die cut with spoon
You can watch my video for directions.

This card was inspired by Rachel Tessman with the vertical center step easel card, using the Milkshake tall glass. I also showed an idea that was shared by France Martin (this wasn't on my example card because I saw the idea after I made my example) that uses packing tape to make the tall cup look like it is glass.


Again, I used retired DSP because I hadn't gotten the Dandy Designs DSP from the January-February 2023 Sale-a-bration brochure. I also didn't teach the baby wipe technique that Rachel did in her video. Here are the dimensions:
  • 4 1/4" X 11" Flirty Flamingo cardstock (cutting and scoring as in the diagram and shown in the video)
  • 2 1/8" X 4 1/2" Basic White cardstock 
  • 4 1/8" X 4 3/8" Basic White cardstock 
  • 7/8" X 4 3/8" DSP (X 2)
  • 1/2" X 2 1/4" Flirty Flamingo 
  • 7/8" X 4 1/8" Pool Party cardstock
  • Basic White cardstock scraps for stamping and die cutting
  • Silver Foil scrap to die cut spoon
  • 14" White Glittered Organdy ribbon 
Click the video link to see how I made the card, including some tips to use. The diagram below shows the scoring and cutting for the card base. Scoring is represented by the blue dashed lines, and cutting is the solid red lines. The measurement directions are explained on the video.


Thank you for taking the time to visit my blog. If you'd like to purchase products to make these paper crafting projects or others, I hope that you will consider shopping with me. It would help my business if you would also share my YouTube videos. 

Tuesday, January 24, 2023

Dinosaur Retired Replay

The Host for my local in person class wanted to make some kid cards with dinosaurs because her grandson loves them. The only dinosaurs I had in my stash is a retired stamp set, No Bones About It. I was able to find some ideas on Pinterest from 2015 using this set. You could use these techniques with other stamp sets that you have.

The first card is using a window sheet to create a see-through effect. In this case to have the skeleton on the window with the body seen from inside. This could work with two step flowers or a scene on the inside with an additional part on the window sheet. You can use any accent color with the black background. The technique can be used for a variety of stamp sets and scenes. I CASEd this from Dawn Griffith, who gave credit to Davette Miller.


  • 4 ¼” X 11” Basic Black cardstock; score in landscape at 5 ½”
  • 4” X 5 ¼” Basic White cardstock
  • 4” X 1 ¼” Color cardstock (X 2)
  • 4” X 3 ¾” Window Sheet
  • 2 ½” X 1” Basic Black cardstock (from piece that is cut off in the first step)
  • 2 ¼” X ¾” Basic White cardstock
  • Twine or ribbon to coordinate with the color cardstock

Watch my video to see how to make this card and learn some helpful hints and tips. Another card that I made using this same fun fold technique is below using another retired stamp set Inspiring Iris.


The other technique we used on another card is stamping an image into embossing paste. This gave the affect of looking like an archaeological dig. I saw the idea on Pinterest and found a photo by Jamilla Ivits, but I couldn't find a website with dimenstions, so I made up my own. I've seen some people use a small image and create a "seal" on a card. You could use embossing paste with stencils, die cuts, and embossing folders. 


  • 5 ½” X 8 ½” Very Vanilla thick cardstock; score in landscape at 4 ¼”
  • 5” X 3 ¾” Crumb Cake cardstock
  • 5 ½” X 1 ½” (retired) Mosaic Mood DSP
  • 2 ½” X 1” (retired) Wood Textures DSP
  • Scrap of Mint Macaron cardstock
You could use any designer series paper (DSP) and coordinating colors. To see how to make this card watch the video. I also made another card using a different stamp set, which is also retired (Inspiring Iris), to show how the technique may be used. 


Thank you for sharing my love of paper crafting. I would love for you to share my ideas with others, and if you are interested in some of the tools and products to create similar projects, please click on the shop icon above to shop with me. 

Monday, December 19, 2022

Christmas Open House

 This time of year many people tend to send a lot of cards to family and friends. I chose to host a Christmas Open House for my in person class for December 2022. There were so many great ideas on Pinterest using Stampin' Up! Decorated with Happiness and Kindest Gnomes stamp sets, so there were 6 different shoebox cards to choose from. The morning allowed everyone to work at their own pace and we had random Prize Patrols for gifts. I decided to share the card recipe and instructions here and not try to make videos. Some of the demonstrators that inspired my choices had dimensions to follow and some did not, but photos of their cards got my juices flowing. 

Two Time Stamp Card
(Inspired by Annette Elias)
5 ½” X 8 ½” Cherry Cobbler cardstock
5 ¼” X 4” Basic White cardstock
3 ½” X 3 ¼” Evening Evergreen cardstock
3 3/8” X 3 1/8” Basic White cardstock
Linen thread

1. Score the card base in landscape at 4 ¼”, fold and burnish.
2. Stamp the detailed bough on the card front with Cherry Cobbler ink, 1st and 2nd generation, over the cardstock.
3. On the small white piece stamp the bough background in Old Olive near and off of the top of the piece, and then stamp the detailed bough in Evening Evergreen over the background image. Stamp the detailed ornament stamps in Cherry Cobbler hanging from the boughs or from the top across the white piece, and then stamp the “scribbles” in a stamp off (2nd generation) of Cherry Cobbler over the ornaments.
4. Adhere the white piece to the green piece and wrap the linen thread twice around the top of the stamped piece and tie a simple bow.
5. Glue the stamped piece to the card front.
6. Stamp image/sentiment as desired on the large white piece and adhere to the inside of the card.
7. Stamp detailed boughs to the envelope flap in Evening Evergreen ink.

Gold Bell Card
(Inspired by Theresa Gerrard)
5 ½” X 8 ½” Thick Basic White cardstock
5 ¼” X 4” Cherry Cobbler/Evening Evergreen cardstock
5” X 3 ¾’ Cherry Cobbler/Evening Evergreen Designer Series Paper (DSP)
4 ½” X 3” Basic White cardstock (label)
1 ½” X 2” Evening Evergreen cardstock (boughs)
1 ¼” X 1” Cherry Cobbler cardstock (bow)
2” X 1 ¾” Gold Foil (bell)

1. Score the card base in landscape at 4 ¼”, fold and burnish.
2. Using the Stampin’ Cut & Emboss mini die cut the bell (don’t forget to use the protector sheet to keep from scratching the gold with the cutting plate), the bow, the boughs (you will need 2)-these were from Decorated with Happiness bundle, and the label (I used a retired set of labels I had on hand).
3. Figure out where you want the bell to be on the white label and stamp the “scribble mark” where it will be behind the bell with Cherry Cobbler ink. 
4. Stamp the sentiment at the bottom of the label with Versa Mark ink, sprinkle with gold embossing powder, and heat set.
5. Adhere the large cardstock piece to the front of the card base and then glue the DSP over this.
6. Stick the label to the center of the card, and then glue the bell, boughs and bow over the stamped “scribble mark”.
7. Add red rhinestone gems and a gold gem as desired.
8. Stamp an image on the front of the envelope.

Emboss Resist Ornaments Card
(I couldn't find the Demonstrator that designed the card I saw.)
5 ½” X 8 ½” Thick Basic White cardstock
5 ¼” X 4” Pacific Point cardstock
5 1/8” X 3 7/8” Basic White cardstock
5 1/8” X 1 ½” Pacific Point Designer Series Paper (DSP)
2” X 3” Basic White cardstock (X 3)

1. Score the card base at 4 1/4”, fold and burnish.
2. Use the Stampin’ Cut & Emboss mini to cut 3 of the scallop rectangles (you may wish to make these a little smaller by moving the die in along two sides using the stitches as a guide--I wished I had the Postage Stamp Punch, which is what I believe was used on the card I saw). Smaller rectangles would allow you to see more of the background DSP.
3. Stamp the ornament stamps in Versa Mark ink on each of the rectangles, sprinkle with silver embossing powder, and heat set. Once these are cooled, stamp the “scribbles” in Balmy Blue ink over the embossed images.
4. Stamp a sentiment in the lower right corner of the larger white cardstock piece in Pacific Point ink.
5. Adhere the Pacific Point cardstock onto the card base.
6. Glue the larger white piece onto the card front, and then stick the DSP across the white piece just above the center.
7. Use dimensionals to add the rectangles over the DSP across the card front (this is why I suggest to make them a little smaller, so you can see more of the DSP from behind and spread these apart from each other).
8. Stamp image/sentiment inside the card.
9. Stamp the snowflakes from this stamp set all over the flap of the envelope.

Blended Gnome Snowflake Card
(Inspired by Connie Babbart)
4 ¼” X 11” Balmy Blue cardstock
5 ¼” X 4” Basic White cardstock (X 2)
2 ½” X 2” Basic White cardstock
¾” X 3 ¼” Basic White cardstock
6” X 2 ¼” Designer Series Paper
Wonderful Snowflake
Rhinestones

1. Score the card base in landscape at 5 ½”, fold and burnish.
2. Use a blending brush to add Balmy Blue ink from the center outward on one of the large white cardstock pieces.
3. Stamp “splatter” in Balmy Blue ink around the cardstock as desired (I used the splatter from another stamp set).
4. Stamp the gnome on the small white cardstock in Memento Tuxedo Black ink and color as desired. Cut this out with the die using the Stampin’ Cut & Emboss mini.
5. Stamp a sentiment on the white strip with Night of Navy or Starry Sky ink and punch the ends with the Lovely Labels pick a punch.
6. Glue the blended white cardstock piece to the balmy blue base.
7. Use a glue dot to adhere the Wonderful Snowflake in the center of the white card front.
8. Add dimensionals to the back of the gnome and stick over the snowflake.
9. Pop up the sentiment strip toward the bottom right of the card front. 
10. Add rhinestones as desired. 
11. Stamp image/sentiment on the other white cardstock piece, color as desired, and adhere to the inside of the card.
12. Add glue to the envelope flap and adhere the large DSP piece. Use snips to cut off the excess from the inside.

Gnome Strips Card
(Inspired by Caroline Manwaring)
4 ½” X 11” Thick Basic White cardstock
3 ½” X 4 ½” Balmy Blue cardstock
1” X 4 ¼” Designer Series Paper (1 each of 3 designs)
1 ¼” X 3” Pacific Point cardstock
2 ½” X 2” Basic White cardstock
2 ½” X 2” Silver Foil
Silver and White Twine (about 16”)
Blue Gems

1. Score the card base in landscape at 5 ½”, fold and burnish.
2. Emboss the front of the white card base with the Whimsical Trees folder (this is 3D, so use the base plate, embossing folder with the cardstock inside and the gray special plate with the Stampin' Cut & Emboss).
3. Stamp the Girl Gnome on the small white cardstock in Memento Tuxedo Black ink. Color as desired. Cut out the gnome using the die and the Stampin’ Cut & Emboss mini.
4. Stamp a sentiment on the Pacific Point cardstock with Versa Mark, sprinkle with white embossing powder, and heat set. Cut out the sentiment with the stitched flag die (from a retired set of dies I had) and the Stampin’ Cut & Emboss mini.
5. Punch the silver foil with the Everyday Label and cut off one end to make it a tag.
6. Glue the strips onto the balmy blue cardstock, and then adhere to the center of the card front.
7. Stick the “tag” and “sentiment flag” over the strips, and then use dimensionals to pop up the gnome over these.
8. Fold the twine in half and tie a bow (cut it in half to create two 8” pieces). Use a glue dot to stick the bow on the “tag”.
9. Stamp snowflakes on the front of the envelope.

Dancing Gnome Card
(Inspired by Lisa Ann Bernard & Susan Campfield)

5 ½” X 8 ½” Garden Green cardstock
5 ¼” X 4” Real Red thin plaid DSP
5 ¼” X 4” Basic White cardstock
2 ¾” X 4” Basic White cardstock (scallop rectangle)
2” X 2” Basic White (beard)
1 ¾” X 1” Basic Black (boots)
2” X 1 ¾” Garden Green DSP (hat)
1” X 3” Garden Green DSP
¾” X 3” Diagonal Stripe DSP
½” X 3” Real Red thick plaid DSP
Petal Pink (nose)
Basic White scrap strip (Modern Label or Classic Label punch)

1. Score the card base in landscape at 4 ¼”, fold and burnish.
2. Adhere the thin plaid DSP to the green card base. 
3. Die cut the following using the Stampin’ Cut & Emboss mini:
    a. Scallop rectangle from the white cardstock
    b. Beard from the small white cardstock
    c. Boots from the black cardstock
    d. Hat from the green DSP
    e. Nose from the petal pink scrap
4. Punch the flag ends at one end of the 3 DSP strips with the Banners pick a punch and either the Modern Label or Classic Label (both of these are retired-you can use anything you have or just cut a strip and round the points) punch from the white scrap strip (this will be the mechanism for the swinging legs).
5. Measure out where you want to place the scallop rectangle and place the DSP strips so they will go under the rectangle. Glue the strips in place.
6. Adhere the scallop rectangle over the strips.
7. Stick the hat and nose onto the beard where shown (I used a little white glue on the beard and stuck the pieces to it.
8. Add one end of the punched white piece to the back of the boots piece. Measure where the boots need to be under the beard so they don't hang down too low and cut down the white piece as needed. Punch a hole (to fit around a mini dimensional) near the cut end. Lay this on the back of the beard piece and add a mini dimensional to the center of the hole. Place mini dimensionals at the top of the hat and along the sides to act as a stopper for the swinging piece. (Susan Campfield has a video showing this part.)
9. Stick this combination of gnome pieces to the center of the scallop rectangle.
10. Add glittered clear gems to the front of the card.
11. Stamp image/sentiment on the large white cardstock (make sure the piece is in landscape before stamping), color if desired, and glue to the inside of the card base.
12. Stamp an image to the front of the envelope.

I hope that you enjoyed viewing these cards. If you would like to purchase the Decorated with Happiness bundle and/or the Kindest Gnomes bundle, please shop from my blog and hurry! These items are on the retiring list from the July-December 2022 mini catalog, and they are only available while supplies last. Thank you for visiting my blog, and I hope that you will return to view other posts in the future.


Sunday, October 23, 2022

Holidays de Trois

 The July through December 2022 mini catalog is full of so many great holiday products, and since the holidays are coming on at full force the host for my local stamp class chose three cards--one for Halloween, one for Thanksgiving, and one for Christmas/Winter. There are also some very talented people that share the cards that they make on Pinterest and Facebook that inspire me for using the new products.

I fell in love with the Best Wishes stamp set and bought it early. Then I found other people sharing great ways to use it. The first card we made was taken from a card shared by Janneke Dijksha-DeJong. I used some other products and tools that I had that are now retired. 


The dimensions for the pieces are as follows:
  • 5 ½” X 8 ½” Thick Basic White cardstock; score in landscape at 4 ¼”
  • 5 ¼” X 4” Basic Black cardstock
  • 5 1/8” X 3 7/8” Basic White cardstock
  • 2 7/8” Basic White stitched circle
  • 2 3/8” Pumpkin Pic stitched circle
  • 3” X 3” scrap Basic White
  • 4 ¾” X ½” Designer Series Paper (DSP)
  • 4 ½” X 1” DSP
  • 4” X 3/4” DSP
  • Black twine
  • Matte Black Dots
Visit the video on YouTube for putting this together and tips that I share.

The next card for Thanksgiving is using a stamp set that has nothing to do with fall--Forever Fern. Pat Tecza shared a simple way to create a fall wreath using the masking technique. There is a new masking paper available from Stampin' Up! that helps create this look.


The card recipe includes:
  • 5 ½” X 8 ½” Thick Basic White cardstock; score in landscape at 4 ¼”
  • 5 3/8” X 4 1/8” Rich Razzleberry cardstock
  • 5 ¼” X 4” Basic White cardstock
  • 2” circle of masking paper (stick onto your skin a little bit to remove some of the tacky)
  • Color dots
  • (Maybe, if desired, 2 ¼” white circle to stamp sentiment on and pop up over the center of the wreath)
You can watch how to use this technique on this video on YouTube. 

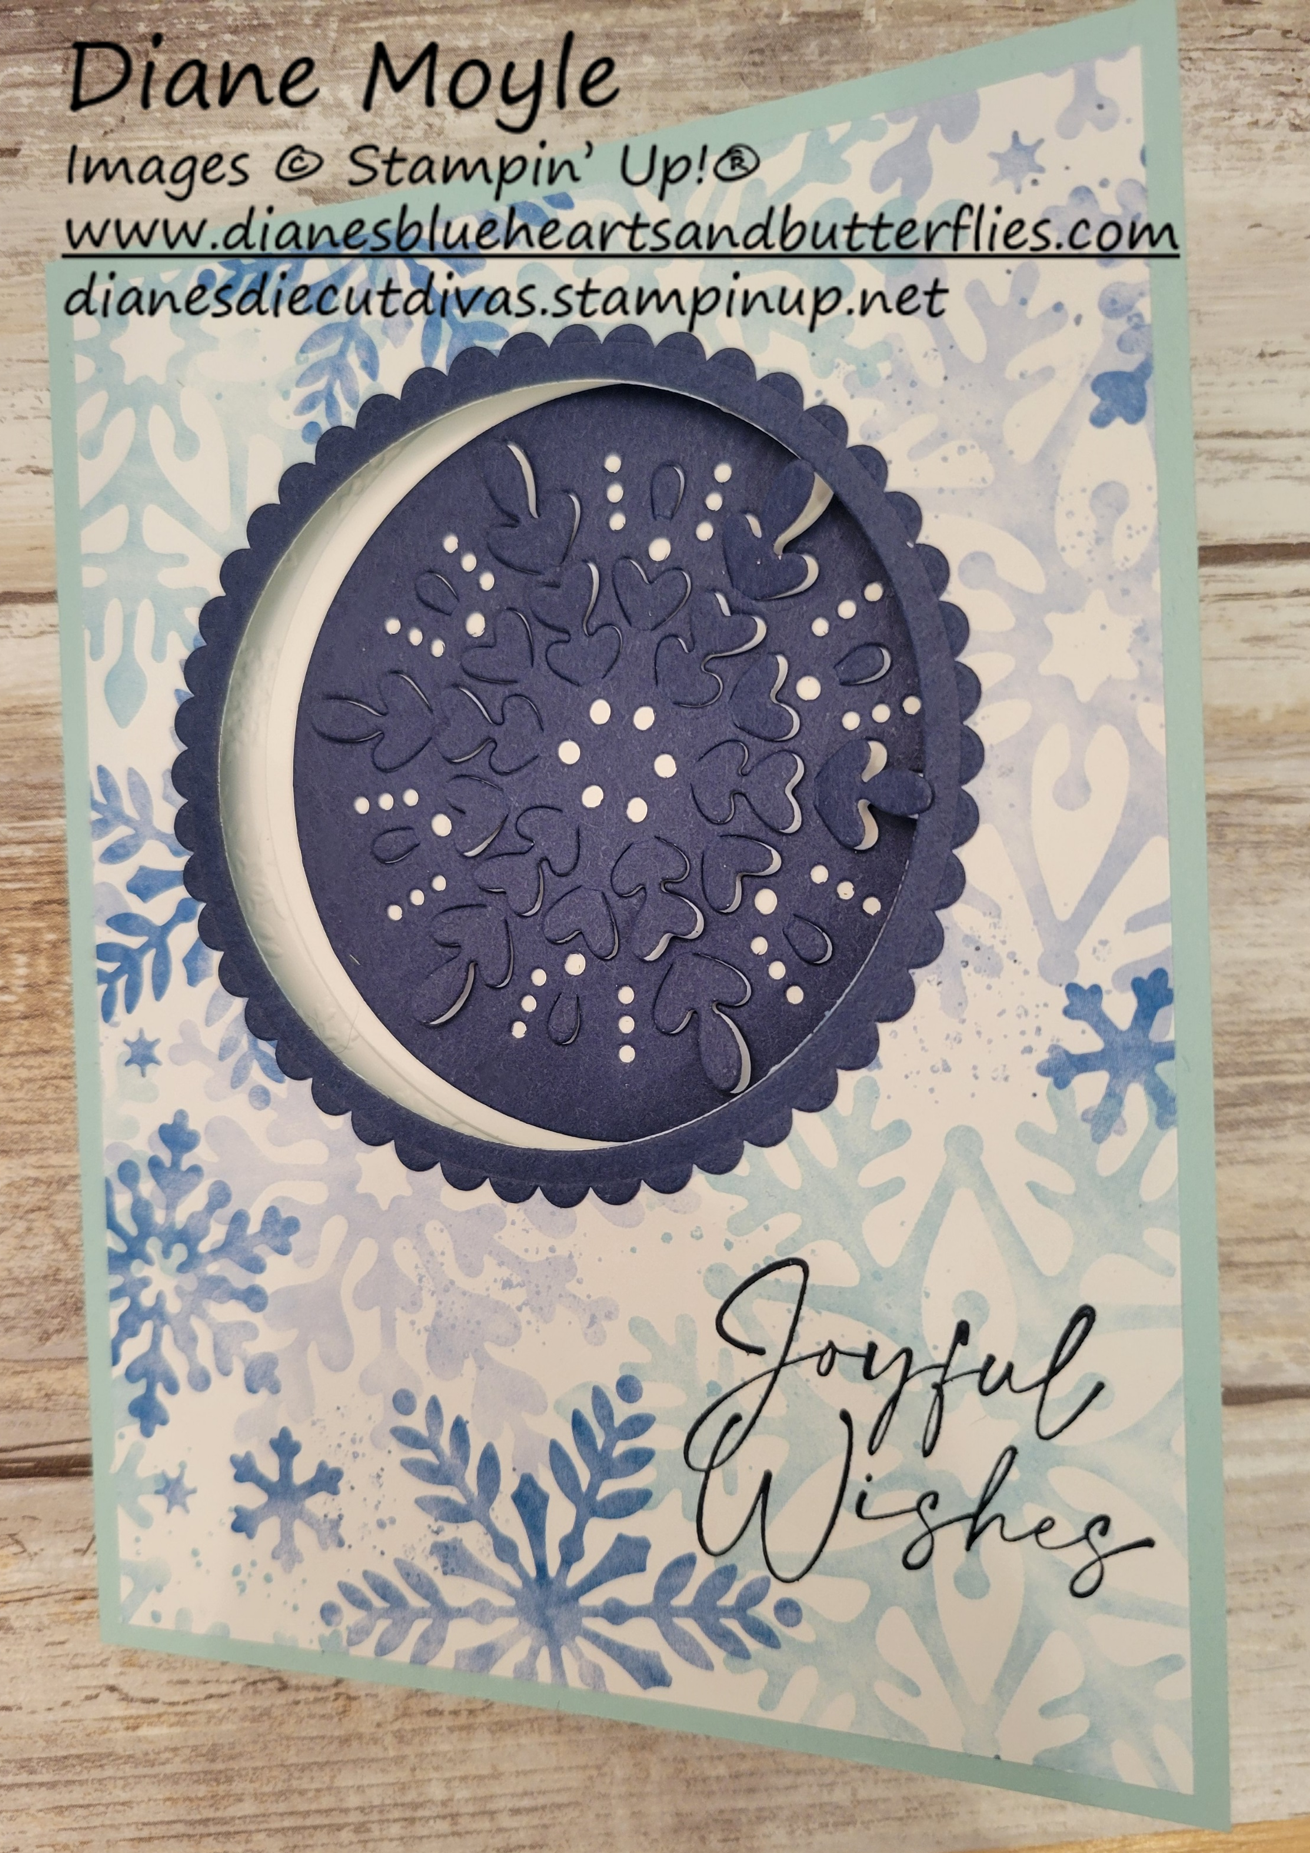
Another new product that caught my eye was the Snowflake specialty vellum. Some pieces are white flocked images and some are iridescent metallic images on the vellum. I loved a card that Michelle Last made that inspired the third card we made at the stamp class. This card used the Joyful Flurry stamp set for sentiments and images inside the card and the Frosted Flurry dies. 


Below are the measurements for the layers on this card:
  • 5 1/2” X 8 ½” Night of Navy cardstock; score in landscape at 4 ¼”
  • 5 ¼” X 4” Specialty Flocked Snowflake Vellum
  • 5 ¼” X 4” Basic White cardstock (inside)
  • 5 ¼” X 1 ½” Vellum cardstock
  • 4th from largest circle die (Layered circles) from Silver Foil
  • 2 small snowflakes die cut from Silver Foil
  • Colored rhinestones
This YouTube video shares some tips about working with vellum and how to make embossed sentiments in other colors.

If you like any of these projects, please like and share the videos, and subscribe to my YouTube channel. When you click the bell icon, you will be notified when I upload a new video. I also hope that you will Shop with Me to purchase any of the stamp sets, dies, designer series paper, vellum, and so on.

A few other projects that I made with the Best Witches and Joyful Flurry sets are below. Maybe they will inspire you to make your own creations.

Inspired by Vicki Burdick
  • 5 1/2" X 8 1/2" Basic Black cardstock; score in landscape at 4 1/4"
  • 5 3/8" X 4 1/8" Basic White cardstock
  • 5 1/4" X 4" Designer Series Paper
  • 4 1/2" X 3 1/4" Gorgeous Grape cardstock
  • 4 3/8" X 3 1/8" Basic Black cardstock
  • 4 1/4" X 3" Basic White Cardstock
  • Scrap white to stamp witch on
  • Metallic Mesh ribbon (I also meant to add Orchid Oasis sparkly ribbon)
  • 5 1/4" X 4" Basic White cardstock (inside)
  • Stamp bats on outer white layer & add stars
Inspired by Sara Sherlock

Inspired by Cathy Autrey

Inspired by Dolly Werner


Friday, August 26, 2022

Working with Vellum

When the Host of my August local class asked for cards using vellum and using Leaves of Holly, I looked through the many ideas I had saved and searched for new ones as well. We finally settled on a couple of ideas.

The first came from a card I saw from Natalie Lapakko. I used her dimensions to create a card using vellum as the card base. This card uses die cuts from Holly Berry dies and Boughs of Holly designer series paper. You may also stamp sentiment from any stamp set including Leaves of Holly.


  • 5 1/2" X 8 1/2" Vellum cardstock; score in landscape at 4 1/4"
  • 4 1/2" X 6 1/2" Old Olive cardstock; score in landscape at 3 1/4"
  • 4" X 2 3/4" (X 2) Designer Series Paper (DSP)
  • 4" X 2 3/4" Basic White cardstock 
  • Holly Berry dies:
  • Label with leaves from white
  • Pine needles from Evening Evergreen (3)
  • Medium detailed leaf from Old Olive and Evening Evergreen 
  • Berries from Real Red
  • Solid background of label leaves from Gold Foil
  • Highlight for berries from Gold Foil
  • Embellishments as desired
  • See tips and instructions in the video.

Another card demonstrates using an embossing folder on vellum with the 3D Wintry embossing folders, Holly Berry dies, Leaves of Holly stamp set, and Boughs of Holly designer series paper. The card cased was by Lori Pinto.

  • 4 1/4" X 11" or 5 1/2" X 8 1/2"; scored in half landscape 
  • 4" X 5 1/4" Soft Succulent cardstock 
  • 3 3/4" X 5" Designer Series Paper (DSP)
  • 3 1/4" X 4 1/2" Vellum cardstock 
  • Scrap white, cut medium detailed leaf (Holly Berries dies) and stamp medium leaf (Leaves of Holly) and die cut outline
  • Scrap Evening Evergreen for bough
  • White twine bow
  • Other embellishments as desired
  • Watch the video for assembly directions and tips.

I also created a fun fold card using Christmas Season stamp set and Seasonal Labels dies. I saw this card by Mary Deatherage on Pinterest and used product that I had on hand.

Check out her directions on www.stampsnlingers.com.

Thank you for visiting my blog and letting me share my love of paper crafting with you. I hope that if you like what you've seen and would like to purchase any of the products, that you would shop with me. It will also help my YouTube channel if you would like, share and subscribe. Selecting the bell icon will notify you when I upload a new video.

Thursday, June 16, 2022

Inspiration Found

There are many times that we see products in catalogs and have a hard time seeing how they can be used with other unrelated (not in the same suite) products. We also may not connect other images as using a stamp set in a totally different way. This has been my experience many times. 
I held my first make and take event and shared some different ways to use some of the products in the Stampin' Up! 2022-2023 Annual Catalog as well as spotlighting some retiring products that I really loved. There was also a really great technique that France Martin shared and has been used by so many others called peel away. I couldn't wait to show it to those in my local group and on the blog.

Two of the cards used the Wisteria Wishes stamp set and Wisteria dies (the bundle saves 10% off the individual product cost). The first is just stamps, ink, and paper.

  • 4 ¼” X 11” color cardstock; score in landscape 5 ½”
  • 4 1/8” X 5 3/8” Garden Green cardstock (X 2)
  • 4” X 5 ¼” Basic White cardstock (X 2)
  • Embellishments as desired
  • Watch the video for instructions. I forgot to add the embellishments at the end of the video.
The second I found in the Catalog on page 167. I nearly missed it, and it shows a completely different way to use the products. 

  • 5 ½” X 8 ½” Crumb Cake cardstock; score in landscape at 4 ¼”
  • 4” X 5 ¼” Crumb Cake cardstock
  • 4” X 5 ¼” Basic White cardstock (inside)
  • 2 3/8” X 3 7/8” Tahitian Tide/Balmy Blue Designer Series Paper (DSP)
  • 2" X 5 ½” Basic White cardstock
  • Scrap of Real Red cardstock to die cut label from Beautiful Shapes
  • Scrap of Basic White cardstock to stamp and die cut 6 “trees”
  • Sequins, rhinestones, etc.
  • The video demonstrates how to create this card.
The New Horizons designer series paper, On the Horizon stamp set and Horizon dies are all retiring as of June 30, 2022. These lend themselves to so many scenic cards. When I saw France Martin's peel away cards I envisioned using these products to create some sympathy cards. I used some retired sentiments that I had on hand, and they were so serene.


  • 5 ½” X 8 ½” Thick Basic White cardstock; score in landscape at 4 ¼”
  • 5 1/8” X 3 7/8” background Designer Series Paper (DSP) OR Basic White cardstock that you create a background scenery or a row of flowers
  • 5 ¼” X 4” Basic White cardstock
  • See how to do this technique in the video.
Another card was to highlight the new designer series paper "Hues of Happiness". I used some retired butterfly dies that I had on hand; however,  I later noticed that it would have worked very well with the Brilliant Wings dies. You could use the framelits that cuts the group of butterflies out of vellum and then the detailed dies to cut from white to place over the vellum. I also used Adhesive Sheets for this card.


  • 4 ¼” X 11” Coordinating Color cardstock; score in landscape at 5 ½”
  • 4 1/8” X 5 3/8” Hue of Happiness Designer Series Paper (DSP)
  • 4” X 5 ¼” Basic White cardstock with Adhesive Sheet backing to die cut detailed butterflies
  • 4” X 5 ¼” Vellum cardstock to die cut background butterflies (Brilliant Butterflies)
  • 4” X 5 ¼” Basic White cardstock (inside)
  • Embellishments as desired (gems, jewels, thread, ribbon)
  • The video shares tips and shows how to put things together. I forgot to add the embellishments while I was making the video, but remembered after I stopped recording. 
Thank you for visiting my blog and letting me share what I love with you. I would love for you to check out my YouTube channel, like the videos, share them with friends, and subscribe. Also, click the bell icon to be notified when I upload new videos. 
I'd love to hear from you and also go back to read comments. If you would like to purchase any products, please click on the Shop with Me button to select me as the Demonstrator for your order.

Sunday, May 22, 2022

Scenic Cards with Grassy Grove and the New Horizons Suite of Products

The New Horizons designer series paper (DSP), On the Horizon and Horizon dies will only be available while supplies last from the January-June 2022 Mini Catalog, which ends on June 30, 2022. I've loved this paper and wanted to teach some techniques using it as well as the On the Horizon and Grassy Grove bundles. Grassy Grove bundle has carried over to the 2022-2023 Annual Catalog, but the other items are retiring.
 

The first is a more simple card CASED by Sherry Roth. The stamping and blending in the background really helps the tag to stand out.
  • 5 1/2" X 8 1/2" Basic White thick cardstock; scored in landscape at 4 1/4"
  • 4 1/4" X 2 1/4" Misty Moonlight cardstock, die cut largest Tailor Made Tag die
  • 2" X 2 3/5"Basic White cardstock, die cut largest fence die from Horizon dies
  • Bow from 8" Petal Pink cotton ribbon
  • Check out the directions for the card on my YouTube channel.

The next card features more of the Grassy Grove stamp set and Grove dies and shows a Triple Fold fun fold with a see through card front. CASED by Becky Hahn, who was inspired by Terri Gaines. 
  • 4 1/4" X 11" Basic Black cardstock, score in landscape at 5 1/2"
  • 4" X 10 1/2" Basic White cardstock, score in landscape at 5 1/4"
  • 3 3/4" X 5" New Horizons designer series paper (DSP), making sure the direction of the design is horizontal with the 5" length
  • Scrap Basic Black if you wish to die cut the deer
  • Link to the video for directions.
Thank you for visiting my blog and videos. You may purchase any of these products through my online store link on this website. I appreciate all of the support I've had over the years. This year celebrates my 10th year with Stampin' Up! as a Demonstrator, and I've made some wonderful friends, gotten to share what I love to do, and stretched my wings to try new ways of sharing. Visit the links to my YouTube channel, select to subscribe and click the bell icon to be notified when I upload a new video.

Saturday, May 7, 2022

Flying through April

March and April were so full of things that I needed to get done and helping my husband work on his shop that we were finally able to get built. I ended up canceling the local in person class to focus on things at home. 

The winds we normally get in March actually showed up in April, and there have been few days without blowing sands in the high winds.

April 23rd was my scheduled Stampin' Up! OnTour event. There was a lot of sharing of ideas using many of the new products in the 2022-2023 Annual Catalog, as well as networking with other Demonstrators. Part of this online event was a virtual card swap using new or current products. A gift for  registering for the event was a ree stamp set (chosen randomly by Stampin' Up!). I received Bottled Happiness. Here's the swap I made.
My husband is very happy to see his shop come together after many years of waiting and of preparing. Here's some pictures of what we've done. 
We wanted to insulate it due to cold winters here.
We had to rent a Sky Jack to run electrical and install lights because the ceiling is so tall.
With all of my husband's tools, benches, and shelves, it is filling up fast. We still need to get things out of one more shed to put in the shop. Then he can start organizing.
We also got a small wooden shed to put the electrical breaker box and air compressor in that is outside of the shop. It really cuts down on the noise inside. Yes, I am aware that he didn't line up the vents in the doors, and I've explained how this pains my OCD.

I appreciate the patience with me for taking a little time off for my home and family.