Showing posts with label Card Sets. Show all posts

Sunday, April 27, 2025

Thoughtful Journey

There are so many great designer series papers available, and I always fall in love with the landscape types. This post features the Thoughtful Journey papers from Stampin' Up! One of the greatest things about paper crafting is sharing cards with others that they can send to their family and friends. This set makes a wonderful gift. Mother's Day is coming up soon, and most mothers would enjoy receiving this.


So many other people shared ideas for cards using this designer series paper, and I had to choose only 4 cards to create my boxed set. I came up with some dimensions for those that I couldn't find measurements.

Card 1 idea came from Mary Fish.

  • 4 ¼” X 11” Very Vanilla Cardstock; score in landscape at 5 ½”
  • 4” X 5 ¼” Mossy Meadow Cardstock
  • 3 ¾” X 5” Petunia Pop Cardstock
  • 3 ½” X 4 ¾” Thoughtful Journey DSP
  • 2 ½” X 1 ¾” Mossy Meadow Cardstock, die cut label (Unbounded Love dies) layer
  • 2 ½” X 1 ½” Vanilla Cardstock, die cut label (Unbounded Love dies), stamp sentiment in Mossy Meadow
  • Linen Thread (wrap twice around the DSP/Petunia Pop layers & tie bow)
  • Petunia Pop Color Dots

Card 2 idea came from Alejandra Gomez.

  • 5 ½” X 8 ½” Mossy Meadow Cardstock; score in landscape at 4 ¼”
  • 5 ¼” X 4” Misty Moonlight Cardstock
  • 5 ¼” X 4” Basic White Cardstock (inside)
  • 5” X 3 ¾” Retired Irresistibly Yours Specialty DSP
  • 3 ¾” X 2” Misty Moonlight Cardstock
  • 3 ½” X 1 ¾” Thoughtful Journey DSP
  • 3” X 1 ½” Thoughtful Journey DSP (blue sky), cut the 1 ½” side into ½” strips (x3)
  • 5” X 2 ½” Mossy Meadow Cardstock, die cut flower vine
  • 5” X 2 ½” Petunia Pop Cardstock, die cut flower vine (cut the flowers out to glue onto the green one)
  • 3” X 1 ¼” Basic White Cardstock, die cut label (Unbounded Love dies), stamp sentiment in Mossy Meadow
  •  Linen Thread (wrap 3 times around the smaller DSP/Misty Moonlight layers and tie bow)
  • Gems

Card 3 idea came from Julie Davison.

  • 5 ½” X 4 ¼” Mossy Meadow Cardstock
  • 4” X 1 1/8” Thoughtful Designs Specialty DSP (X 2)
  • 3” X 8 ½” Mossy Meadow Cardstock; score in landscape at 4 ¼”
  • 2 ¾” X 4” Very Vanilla Cardstock (X 2, one for front and one for inside)
  • 2 ½” X 3 ¾” Thoughtful Journey DSP
  • 1 ¾” Very Vanilla Cardstock Circle, stamp with flower (color with Stampin’ Write Markers)
  • 4 ¾” X 3” Lost Lagoon Cardstock, die cut a vine (example used Retired Flourish Thinlits)
  • 2 ¼” X 1 ¼” Petunia Pop Cardstock, stamp sentiment in Blackberry Bliss (if desired, stamp background image in Petunia Pop)
  • Pearl Gem

Card 4 idea came from Carol Buckalew.

  • 4 ¼” X 11” Very Vanilla Cardstock; score in landscape at 5 ½”
  • 5 ¼” X 4” Thoughtful Designs Specialty DSP
  • 3 ¼” X 3 ¼” Pretty Peacock Cardstock
  • 3” X 2 5/8” Thoughtful Journey DSP, cut 3 strips at 7/8” on the 2 5/8” side
  • 3 ½” X 2” Pretty Peacock Cardstock, die cut label layer
  • 3” X 1 ¾” Very Vanilla Cardstock, die cut label, stamp sentiment in Pretty Peacock
  • Mossy Meadow Twine
  • 3 ¼” X 2 ½” Very Vanilla Cardstock, die cut vine (example used Retired Forever Flourishing vine)
  • Pretty Peacock Gems

The box to hold the set of cards was created from the idea shared by Darby from the Rejoice and Create YouTube channel.

  • 10 3/8” X 6 ½” Calypso Coral Cardstock; score in landscape at 4 ¾” from each end
  • 8” X 7 ½” Calypso Coral Cardstock; score in landscape at ¾”, 5 ¼” & 6”, turn counterclockwise and score at ¾” from each end
  • 4 ¼” X 6” Thoughtful Journey DSP (cover)
  • 1 ¾” X 5 ¾” Thoughtful Journey DSP (inside box)
  • 10 ½” X 5 ½” coordinating DSP (pocket); score in landscape at 6 ¼” & 9 ¾”, turn to portrait, score at ½” from each end
  • Either Ribbon or Magnet for keeping the box closed
  • Misty Moonlight Ribbon for the front
  • 2 ¾” X 2” Mossy Meadow Cardstock, die cut label layer (Unbounded Love dies)
  • 2 ¼” X 1 ½” Very Vanilla Cardstock, punch oval 2” X 1 3/8” label, stamp sentiment in Calypso Coral
Diagrams: These show the folding, cutting & punching (corner rounder) to create the box using the score lines from the above recipe.
Cover
Inside Box
Inside Pocket

You can view the assemble for the cards and the gift box on my YouTube video. Thank you for visiting my blog. Sharing my channel and blog posts help grow my presence, and I appreciate those who do. You can purchase the DSP at Stampin' Up!

I shared a thank you gift at my class using an idea I got from Jennifer Blaschak. It was a nail file sleeve. It uses a 6" X 6" DSP that you score at 1 1/2", 3", 4 1/2" and then cut from the top of the 3" scoreline to the bottom of the 6" corner. Fold the card at each scoreline, adding glue to the long side first, and then gluing the small "tail" that is folded to the back. Punch a hole at the top and add a ribbon. Put a nail file into the sleeve, add a label and other embellishments as desired. You can view her instructions and diagram on her website. 

Monday, February 24, 2025

Getting more from Designer Series Paper

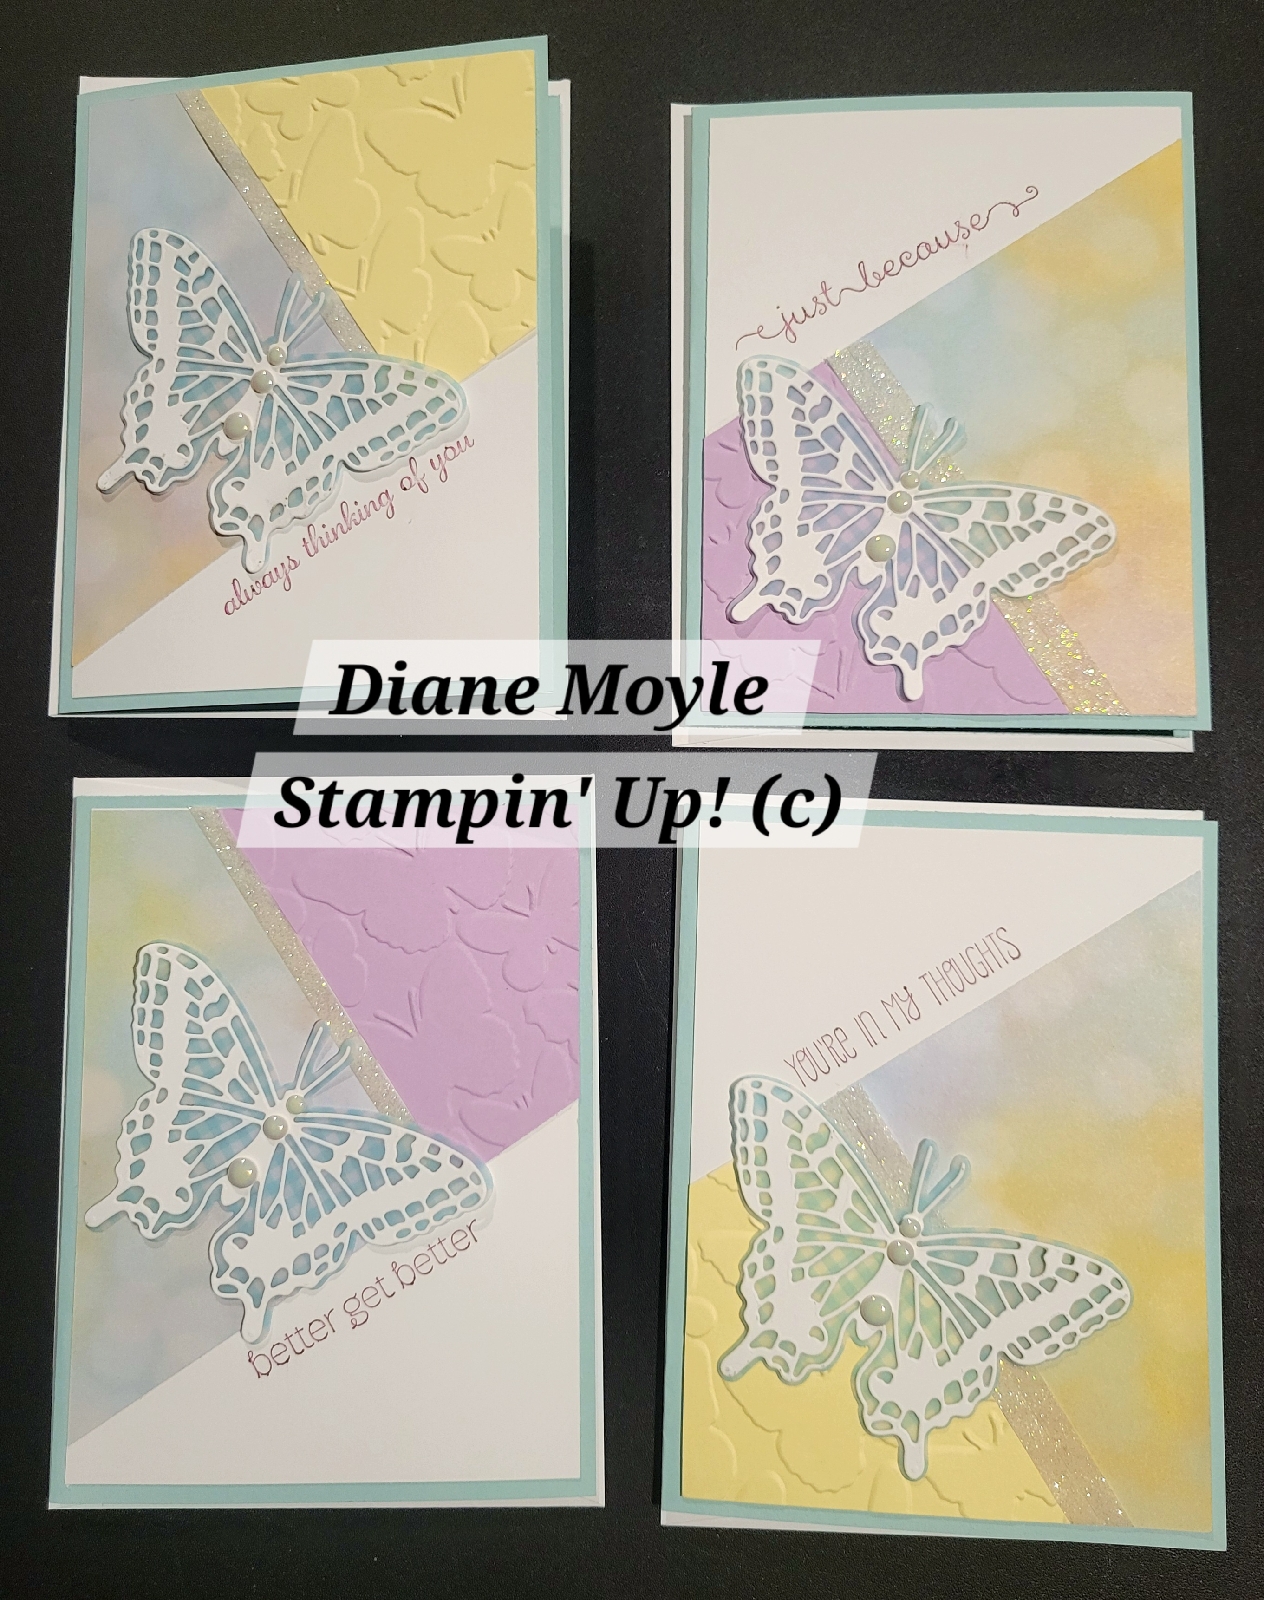
In looking for a way to use the Delightful Wishes suite of products that a customer requested to use, I came across Lisa Curcio's technique to create four cards from one 6" X 6" sheet of Designer Series Paper (DSP). This idea can be used with any paper, theme, or suite of products. I will share the basic idea with another variation that can be used.


Along with the Delightful Wishes suite, I have used some retired stamps and embossing folders because they are what I had on hand. The second set uses the Bokeh DSP with some retired butterfly dies and folder and a retired sentiment stamp sets. The idea is that you can use what you already have, or you can use this technique with any new products that you like. 

Current Products: Delightful Wishes bundle, Tiny Bee trinkets, Floral & Gingham Vellum, Floral Delight 12" X 12" DSP, Beautiful Bokeh 6" X 6" DSP, Antique Pearls,  and you could use: Fern 3D embossing folder, Beautiful Butterflies bundle, Sketched Butterflies bundle, 2024-2026 In Color  Shimmer gems, Tinsel Gems Four-Pack, and Itty Bitty Bokeh Mix.

Retired Products that could be used: Butterflies dies, Butterfly Beauty dies, Butterfly Brilliance stamps, Beauty Abounds stamps, Fluttering embossing folder, Layered leaves dynamic folder, Meadow Moments embossing folders, Colorful Seasons stamps, Seasonal Layers dies, Forever Blossoms stamps, and Cherry blossom dies.

6" X 6" DSP
5 1/2" X 8 1/2" colored cardstock, score in landscape at 4 1/4" (X 4)
5 1/4" X 4" Basic White cardstock (front) (X 4)
5 1/4" X 4" DSP (inside) (X 4)
4 3/4" X 3 1/2" Basic White cardstock (inside) (X 4)
3 3/4" X 2 3/4"" coordinating color cardstock/Vellum cardstock/DSP (X 4)
1/4"-1/2" X 4" strip of coordinating color cardstock/glimmer cardstock/coordinating DSP/ribbon (X 4)
Die cut images/tags/etc. for decorating the front of the card
Embellishments 

Lightly mark 1" from the top left corner of each side of the DSP and cut diagonally between opposing marks as shown in the diagram. 


Emboss the smaller coordinating color cardstock/vellum or just use a coordinating piece of DSP/vellum to go next to the piece of DSP. 

Watch my YouTube video for complete instructions and tips. 

I appreciate your patronage to my blog and hope that you will like and share my video/blog to help my business grow. If you'd like to be notified when I upload a new video, click the bell icon on my channel. Thank you for those who subscribe to my YouTube channel as well. If you like Stampin' Up! products, please consider shopping with me. Have fun trying this technique to create different sets of cards.

Saturday, May 22, 2021

Rip 'n Flip Set of Cards

 Sometimes (if not more often than not) we have packs of designer series paper left over after a project, or we fell in love with some paper and didn't use it very much, so there are sheets still left. I saw Jacque Williams share an idea that she called Rip 'n Flip that looked like a fast and easy way to use up some of the packs of designer series paper that I had left over. I did use some Sale-a-bration designer series paper, 2020 Sale-a-bration stamp set "Tags in Bloom", the Lovely You stamp set (currently in the 2021-2022 annual catalog), the Lovely Labels Pick a Punch, Label Me Lovely punch, and Label Me Fancy punch, along with some ribbons and twines that I had in my studio. I was also inspired by Tricia Morris to create a container for the set of cards to go into. 

Set of Cards

The basic technique is very simple to make the card fronts, and then you just embellish with different ribbons/twines and tags with sentiments. 

5 ½” X 8 ½” Cardstock; score in landscape at 4 ¼” [I used thick white]

5 ¼” X 4” Coordinating Cardstock Layer—Thick White/Thick Vanilla if using a color cardstock base, or coordinating color cardstock if using a white cardstock base [I used Rococo Rose]

(If using a colored cardstock base, 5 ¼” X 4” White or Vanilla cardstock for inside the card.)

6” X 3 7/8” Designer Series Paper (DSP) [I used Paper Blooms from 2021 January & February Sale-a-bration] NOTE: If directional, make sure you cut so it will have the correct orientation when placed on the card; check both sides of the DSP.

Various tags & labels cut from cardstock [I used Tags in Bloom stamp set and punched labels using Label Me Lovely punch, Label Me Fancy punch, and the Lovely Labels Pick a Punch]

Ribbons:

·         36” sea foam/navy twine (cut into 3-6” pieces to go top to bottom and glue to the back and the remainder tied in a bow).

·         24” petal pink/silver twine (cut into 4-6” pieces, 3 go top to bottom and glue to the back and the remainder is tied in a bow).

·         24” seaside/white/silver twine (cut into 4-6” pieces, 3 go top to bottom and glue to the back and the remainder is tied in a bow).

·         12” white sheer ribbon (cut into 2-6” pieces, 1 goes top to bottom and glue to the back and the remainder is tied in a knot over the ribbon).

·         12” olive sheer ribbon (cut into 2-6” pieces, 1 goes top to bottom and glue to the back and the remainder is tied in a knot over the ribbon).

·         12” seaside shimmery ribbon (cut into 2-6” pieces, 1 goes top to bottom and glue to the back and the remainder is tied in a knot over the ribbon).

·         54” navy twine (cut into 3-6” pieces to go top to bottom and glue to the back, the remainder is folded in half and tied into a bow—then cut the folded loop).

·         29” white twine (cut into 3-5” pieces to go side to side and glue to the back, the remainder is folded in half and tied into a bow—then cut the folded loop).

·         19” white ribbon (cut 2-6” pieces to go top to bottom and glue to the back, the remainder is tied into a bow).

·         17” navy ribbon (cut a 6” piece to go top to bottom and glue to the back, the remainder is tied into a bow).

Various sentiment stamps [I used "Tags in Bloom" and "Lovely You"].

Watch my video for a demonstration of how to do the technique.


Card Box for Set of Cards


6 ¾” X 12” coordinating cardstock; score in landscape at 1”, 5 ¾”, 6 ¾” and 11 ½”; rotate 90° clockwise & score at 1”—card pocket

6 ¾” X 12” coordinating cardstock; score in landscape at ½”, 5 ¼”, 6 ¼” and 11”; rotate 90° clockwise & score at 1”—card pocket

5 7/8” X 12” coordinating cardstock; score in landscape at 4 7/8” and 7 1/8”—outside cover

4 ½” X 5 ½” (X 2) Designer Series Paper (DSP)—outside cover (could make this a cardstock layer if desired)

[If there is a cardstock layer, 4 ¼” X 5 ¼” (X 2) DSP—outside cover]

2” X 5 ½” DSP—outside spine (could make this a cardstock layer if desired)

[If there is a cardstock layer, 1 ¾” X 5 ¼”—outside spine]

2” X 5 ½” DSP—inside spine

Velcro Dot, or create a “belly band” with 1” X 10” (X 2) cardstock and create a label to decorate it

Check out my video for putting this together, and see the diagram below for cutting (measurement from the top of the pocket pieces is 4").


I hope you feel inspired to use these ideas to create some great projects or gifts to give away. Thank you for visiting my blog.


Saturday, August 1, 2020

Forever Fern Watercolor Background

A great and easy way to create a watercolor background is by using ink, a clear block, and some water. There are a few ways to do this and each gives a little different look. 


My favorite way is to color the block with the Stampin' Write markers in the colors I want to use, starting with the lightest color, working to the darkest color in several areas over the block. Then I spray it a couple of times with water the Stampin' Mist. Some people like to use rubbing alcohol as it dries quicker. Once the color is a little fluid on the block (and not too wet that it drips) you will "stamp" the background where you want it on the cardstock. 

Another method to get ink onto the block is to use the Stampin' Classic ink pad or Stampin' Spots to apply ink in areas of the clear block. Always start with the lightest ink and work your way to the darkest. Then you will spritz this with either water or alcohol as mentioned above and "stamp" it on your cardstock. 

The last method that I'm aware of is using the Stampin' Classic ink refills. You would add small drops of ink, lightest to darkest, around the block, spritz it, and stamp it. This one can create more "blotches" of ink rather than the fluid watercolor look, but it is an interesting backdrop for stamping.

Once your backgrounds dry, you are ready to stamp images and sentiments over them. This technique allows you to create the color combinations you want for your stamping projects.

In my class we used this water coloring technique and created a set of notecards and envelopes to go inside of a clutch made from Designer Series Paper (DSP). The clutch idea I saw shared by Dawn Griffith from an idea she got from Kris Miller.


We used the Forever Fern stamp set to create the set of cards, the Forever Greenery DSP and Forever Flourishing Dies for the clutch. Check out the video here.