The card below is using the faux soft leather technique using fun foam inspired by a photo of a card made by Krista Thomas. I used a retired stamp set for the duck (Wilderness Awaits), but there are other images in the current catalogs that could be used. I also used the Old World Paper embossing folder and 2021-2022 In Color enamel dots.

5 1/2" X 8 1/2" Early Espresso cardstock; score in landscape at 4 1/4"
5 1/4" X 4" Pear Pizzazz cardstock
5 1/4" X 4" Very Vanilla cardstock
3" X 2 3/4" Early Espresso cardstock
2 3/4" X 2 1/2" Tan Fun Foam
4 1/2" X 1 1/4" Shaded Spruce cardstock
4 3/4" X 1 1/2" Pacific Point cardstock
5 1/4" X 4" Pear Pizzazz cardstock
5 1/4" X 4" Very Vanilla cardstock
3" X 2 3/4" Early Espresso cardstock
2 3/4" X 2 1/2" Tan Fun Foam
4 1/2" X 1 1/4" Shaded Spruce cardstock
4 3/4" X 1 1/2" Pacific Point cardstock
- Stamp the sentiment in Early Espresso ink in the lower right corner of the Pear piece, and then emboss this piece with either the Old World Paper or the Subtle embossing folder.
- Cut “flag” ends in one end of the Spruce and Pacific cardstock strips with the Triple Banner punch.
- Prepare the red rubber image stamp with Early Espresso ink, set aside. Heat the fun foam rectangle with the heat tool until the corners start to fold up and the surface glistens slightly, and then stamp immediately with the inked red rubber image. (Best to use red rubber stamp.) You may want to rub around the piece or image with a sponge and some Crumb Cake ink. Use the stylus end of the Take Your Pick Tool to run around the outline of the image on the fun foam to create the "tooled" look. You may also wish to emboss around the edge of the fun foam with the Stitched with Whimsy dies to create a crazy stitched edge.
- Adhere the soft foam piece to the espresso piece.
- Glue the pear piece to the card front, stick on the pacific and spruce strips overlapping and slightly offset, and then adhere the espresso stamped piece over these.
- Add enamel dots to the pacific strip.
- Stamp the trees from Rustic Retreat in Shaded Spruce ink on the large vanilla piece (in portrait position), and then stick this inside the card.
- View the Video to see a demonstration.
The next card uses a technique to make cardstock look like tooled hard leather inspired by and cased from Erica Cerwin. I used the retired Heirloom Frames dies and embossing folders, but you could use any piece of cardstock that you emboss with a folder (this technique is really cool using the Parisian Flourish folder. I am also using the Corrugated embossing folder that is retired, and you could change to a different folder. The grass pieces here are from the Best Catch bundle, which is also retired; however, there are some equivalent products in the current catalog.


5 ½” X 8 ½” Early Espresso cardstock; score in landscape at 4 ¼”
5 ½” X 4” Crumb Cake cardstock
5 1/4" X 4" Whisper White cardstock (inside)
4 ½” X 3 ½” Cinnamon Cider cardstock
Just Jade cardstock scraps—die cut grass pieces from Best Catch (retired)
2 ¼” Whisper White circle
Linen thread
- Emboss the Crumb Cake piece with the Corrugated embossing folder—have the lines going up and down with the paper in landscape. Measure up from the bottom about 1” on each side and cut half of a ½” circle punch.
- Cut the Cinnamon cardstock with the rectangular Heirloom Frame die & emboss with rectangular frame embossing folder. Press the Versa Mark over the top of the embossed frame, sprinkle with clear embossing powder, and heat set. Repeat if desired.
- Stamp the animal of your choice from Rustic Retreat stamp set on the white circle with Memento Tuxedo Black ink and color with color pencils or markers. I used a Blender Pen to smooth the coloring.
- Wrap the linen thread around the corrugated crumb piece and tie a bow. Adhere this piece to the card front.
- Use dimensionals to add the frame to the front of the corrugated crumb piece at an angle and under the thread. Add the white circles tucked into the bottom of the frame, and then glue the grass pieces (may choose to cut one of them down) over these.
- Stamp the branch from Rustic Retreat stamp set on the white cardstock piece as well as any other sentiment and glue inside.
- View the Demonstration to make this card.
My final card is showing how to make a piece of cardstock look like a soft piece of leather inspired by a card I saw made by Kathy Crow. I used this as a layer on the front of the card.

5 ½” X 8 ½” Crumb Cake cardstock; score in landscape at 4 ¼”
5 3/8” X 4 1/8” Mossy Meadow cardstock
3 1/8” X 1 ¾” Whisper White cardstock stitched rectangle
3 ½” X 2 ¼” Crumb Cake cardstock stitched rectangle
2 ¾” X 1 3/8” Crumb Cake cardstock stitched rectangle
2 3/8” X 1” Whisper White cardstock stitched rectangle
5 ¼” X 4” Whisper White cardstock
Linen Thread Bow
- On the Mossy Meadow piece spritz with 70% alcohol/water from spritz bottle, crumble, unfold, crumble, and unfold to lay out to dry. You may use the heat tool to help dry it out.
- Stamp the cabin (from Rustic Retreat stamp set) on the larger white stitched rectangle in Memento Black, stamp the sentiment on the smaller stitched rectangle in Mossy Meadow, and stamp the branch on the larger white piece (in landscape position) in Mossy Meadow for the inside. Color the cabin with colored pencils or markers. I used the pencils and smoothed it with a Blender Pen.
- Once the Mossy piece is dried, stamp the line of trees repeatedly in Mossy Meadow ink over the surface (in landscape position). Glue the faux soft leather piece on the card front.
- Adhere the white stitched rectangles to the coordinating crumb stitched rectangles, and then glue these to the front of the card. Add the linen thread bow.
- Stick the large white piece inside the card.
- The Video shows this technique and assembly.
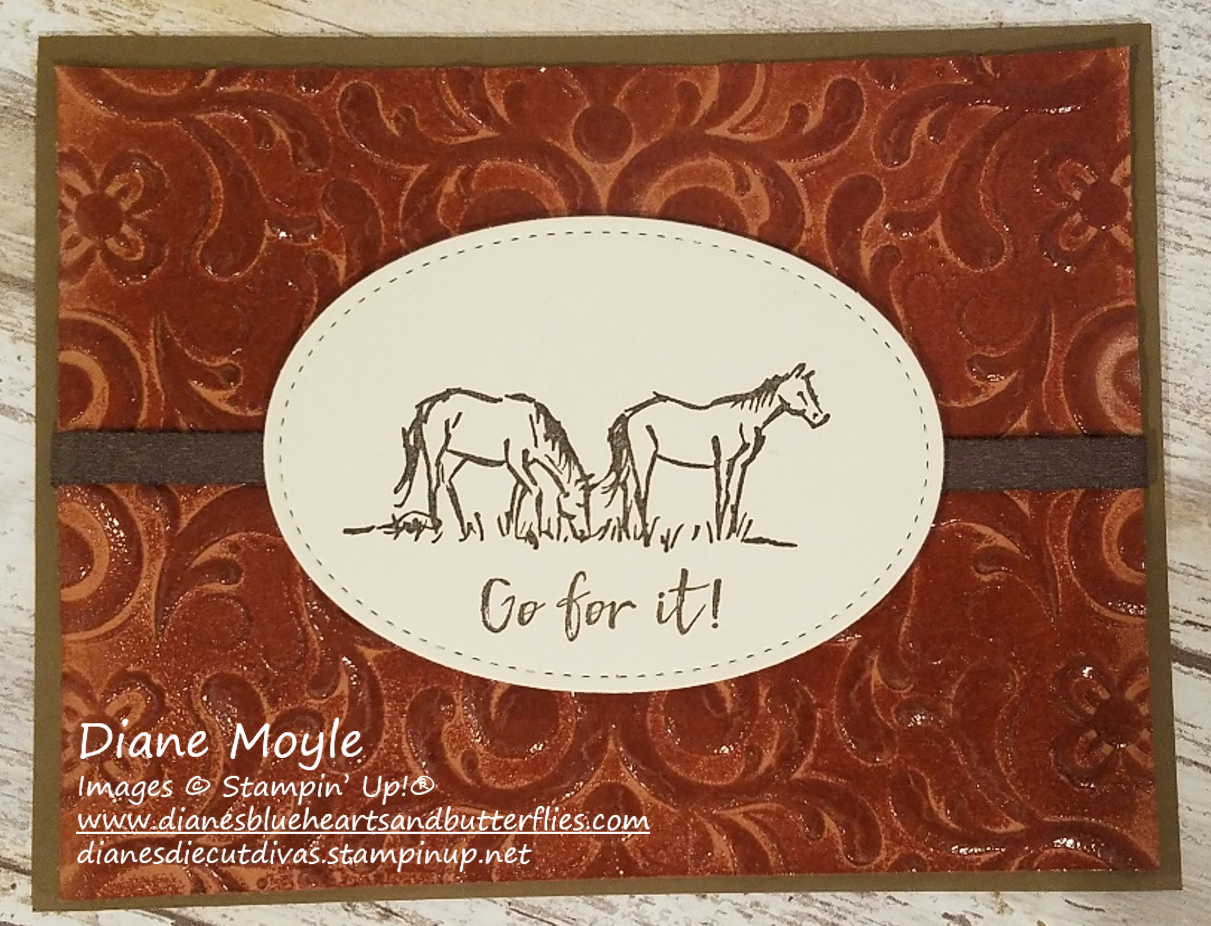
Thank you for visiting my blog and viewing my demonstrations. I hope that you will check out the catalogs and choose to shop with me. Below is another card that I made using the hard tooled leather technique, the Parisian Flourish embossing folder, Faux Suede ribbon, and Let it Ride (retired) stamp set.